Briefly, you have to perform the following tasks:
Introduction
Before you start, you need to create a folder on your hard drive. Call the folder Exercise. If you don't know how to do that, follow these instructions:
1. RIGHT-click your Start button (on the Taskbar) at the bottom of your screen.
2. Then click Explore from the sub-menu that appears
3. In the left pane, scroll up and click on the C drive to highlight it.
4. In the right pane, RIGHT-click on any bit of white space. From the sub-menu that appears, click New, then click Folder from the next menu list.
5. When the New Folder appears, type the word Exercise, then press ENTER.
You now have your Exercise folder on your C drive. Save all your exercises into this folder.
Please type all the HTML code into the exercises. It's no use cheating, by copying and pasting the code to save you writing it. Typing the code will teach you to write it, just as it was necessary to write words when you learnt to read. You will become proficient in writing HTML if you do every exercise correctly!
It is advisable to write all the code into your Notepad program which is provided in Windows. This program can be found by clicking Start, then Programs, then Accessories, then Notepad.
Other points to note are:
• You can keep the Browser and Notepad open at the same time. This allows you to see what effects your changes are having.
• You can also RIGHT-click any opened Web page in a Browser, then click View Source from the sub-menu. You will then be able to access the HTML code.
• Also note that whenever you are asked to type quotes " you must use STRAIGHT quotes NOT curly " .
Tags
HTML documents look a lot like word-processing documents. You can create an HTML document with any word processor or text editor, including the very basic TeachText or SimpleText on the Mac. Also Wordpad or Notepad for Windows, both of which come free with the corresponding operating system software. Although Notepad is the preferred choice.
You can have bold and italic, Larger and Smaller, or it could look type-written.
The HTML code for the above looks like this:
You can have <b>bold</b> and <i>italic</i>, <font size=+2>Larger</font> and <font size=-2>Smaller</font>, or it could look <tt>type-written</tt>.
So what are these < > and what do they do?
When you place something within these you are making something known as a tag. For example the <b> tag is saying to start bold text, and the </b> tag is saying to stop bold text. The tag with the slash (/) is known as the closing tag. Many opening tags require a following closing tag, but not all do. Tags make up the entire structure of an HTML document. They tell the Browser how to display the text or other attributes that you place between them.
<b>Hello my name is Fred</b>
Opening tag Closing tag
Here is two pieces of HTML code, the second of the two has an error in it, what is it?
#1 - Bob jumped OVER the fence.
#1 - Bob jumped <b>OVER</b> the fence.
#2 - Bob jumped UNDER the fence.
#2 - Bob jumped <b>UNDER<b> the fence.
You should have noticed that the second code is missing a slash (/) in the tag after the word UNDER, which causes the web browser to interpret the code as leaving the bold face on, which is why the fence is in bold! This is a common error, so be careful of it!
Tags in HTML are NOT case sensitive. For example... <title> and <TitLE> both mean the same thing and are interpreted as being the same.
Document Structure
HTML files are just normal text files, but have the extension of .htm, .html, or .shtml.
HTML documents have two (2) parts, the head and the body. The body is the larger part of the document, as in the body of a letter. The head of the document contains the document's title and similar information.
The <html> tag identifies the file as HTML code so that it can be recognised by other applications across the Internet. Most Browsers will recognise HTML pages correctly without the tag, but it's advisable to ALWAYS use it.
Example of basic HTML document structure:
<html>
<head><title>My Home Page</title></head>
<body>Everything else goes here</body> </html>
You may find it easier to read if you add extra blank lines between the code, such as: <html>
<head>
<title>My Home Page</title> </head>
<body>
Everything else goes here </body>
</html>
Extra spaces and line breaks (blank lines) will be ignored when the HTML is interpreted, so you can add them if you wish. You can use this to your advantage by adding spaces and returns to help view the elements more clearly while you are writing and designing your page.
Whatever falls between the <title> tags will be the title of the document, when the page is viewed. You can see the title bar at the top of your screen. The only element in the <head> section that is visible to the user is the title of your web page. This is the part you see when a Web site is Bookmarked or added to Favourites. A few things to note are:
• A title CANNOT contain any formatting, images, or links to other pages.
• There must ONE and only ONE title tag in each web document.
• If your title has special characters like accents or foreign letters, you will have to format these characters with their name or number codes (more on this later).
NOTE: You CANNOT use other tags within the <title> tags
Example <title><b>Jim's home page</b></title>
The following is an example of how titles are viewed (these are the words you see at the very top of the screen in the blue bar).
In Netscape Navigator you would see the following:
Netscape -Jim's Home Page OR Jim's Home Page - Netscape
Netscape-(Jim's Home Page) OR Jim's Home Page - Netscape (depending on version)
in Microsoft Internet Explorer you would see the following:
My Home Page - Microsoft Explorer
Jim's Home Page - Microsoft Internet Explorer
Whatever you place between the <body> tags will fall into the major area of the document window, and therefore it is the largest part of your HTML document.
Exercise
Type this into your Notepad text program (click START, then PROGRAMS, then ACCESSORIES, then click NOTEPAD). Type up to the </html> tag.
<html>
<head><title>My First Title</title></head>
<body>This is my first Web page</body>
</html>
Now save the file by doing the following:
1. Click File from the menu.
2. Click Save As.
3.
In
the Save in:
rectangle, at the top, click the down-pointing arrow and navigate
to
your
Exercise folder.
4. In the File name rectangle, at the bottom, save it as unit1.htm
5. Click Save.
After you have saved it, DON' T close the Notepad program. Make sure you add the extension .htm after unit1. If you don't add this extension - you will not be able to view the Web page in a Browser.
Headings.
Headings are some of the most important tags within the <body> of your HTML document. You will usually use a heading to tell what the following section of your page is about. HTML provides up to six levels of headers in a Web page.
The opening tag for a heading is < hn > and the closing tag is < /hn > where n is the size of the heading... from 1 to 6. (1 being largest, and 6 being smallest)
Example of heading tags:
Jake fell over the fence.
<hl>Jake fell over the fence.</hl>
Jake fell over the fence.
<h2>Jake fell over the fence.</h2>
Jake fell over the fence.
<h3>Jake fell over the fence.</h3>
Jake fell over the fence.
<h4>Jake fell over the fence.</h4>
Jake fell over the fence.
<h5>Jake fell over the fence.</h5>
Jake fell over the fence.
<h6>Jake fell over the fence.</h6>
Align Attributes
Many tags support ALIGN attributes.
You can align from the left, centre or right margin.
The ALIGN attribute is placed in the opening tag before the closing >
Left Align
<h1 align=left>LeftAlign</h1>
Centre Align
<h1 align=5center>Centre Align</h1>
Right Align
<h1 aligr=right>Right Align</h1>
To insert a header:
1. Type <hn where n is the number from 1 to 6, in the body section of your HTML document.
2. Type align=direction where direction is left, right or centre.
3. Type >
4. Type the contents of the header.
5. Type </hn> where n is the same as step 1.
Centering
A centring tag can be used with virtually any element on your page, including paragraphs, headers, images and forms.
To centre elements on a page:
1. Type <center>
2. Type the text or create the element you wish to centre.
3. Type </center>
Exercise (a)
Type this into your Notepad text program. Click File from the menu, and then click New. Now save the file, in your Exercise folder, as unit2a.htm and then continue typing the exercise.
<html><head><title>CentreTag</title></head>
<body>
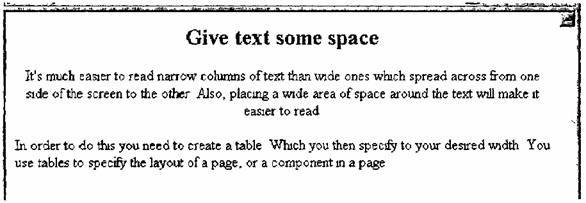
<h2 align=center>Give text some space</h2>
<center>
It's much easier to read narrow columns of text than wide ones which spread across from one side of the screen to the other. Also, placing a wide area of space around the text will make it easier to read.
</center>
<p> In order to do this you need to create a table. Which you then specify to your desired width. You use tables to specify the layout of a page, or a component in a page.
</body></html>
After you have finished typing the above, click File from the menu, and then click Save.
You can now view your work and make any alterations you need
After you have created the page, you can then view it with the following procedure:
Launch Internet Explorer, WITHOUT connecting to the Internet. A message box will indicate that Explorer is unable to create a network socket connection. This is because you have not connected to the Internet, which is what we want, so just click OK or Cancel or whichever is appropriate to Work Offline.
1. Now , click File from the Explorer menu, then select Open.
2. Click the Browse button and navigate to your Exercise folder.
3. Then highlight your unit2a.htm file and click Open.
4. Then click OK. Your page will now be displayed in your Browser. You can see what your exercise should look like on the next page!
If your page does not look right, then you will need to check over your HTML document. Particularly make sure that each tag is enclosed in angled brackets. If you need to edit your page then do the following:
If you need to make changes:
You can keep the Browser and Notepad open at the same time. As you are viewing the results of your HTML exercise in your Browser, do the following:
1. Click your Notepad program on the Taskbar at the bottom of your screen.
2. Now make any changes to your HTML code in Notepad
3. Then click File from the menu, then click Save - to save your Notepad changes.
4. Now click the Browser button on the Taskbar at the bottom of your screen.
5. Then click View from the menu in your Browser
6. Then click Refresh. Or you could just click the Refresh button on the toolbar.
What exercise unit2a.htm should look like in Internet Explorer
NOTE. If your page does not look like this, then follow the instructions on the previous page titled - "If you need to make changes."
Horizontal Ruled Lines
Horizontal Ruled Lines are used to separate different areas of a web page.
The tag for a horizontal ruled line is <hr>.
The horizontal ruled line DOES NOT have a closing tag.
You may also add certain attributes to the <hr> tag, such as WIDTH=number (for fixed pixel width) or WIDTH=number% for a certain percentage of the screen wide, SIZE=number to make the line a certain pixel amount thick, and NOSHADE to turn the line's shading off.
A plain <hr> with no attributes will make the line the full width of the screen.
Type align=direction where direction refers to the way a line should be aligned on the page; either left, right or centre. The align attribute is only effective if you have made the rule narrower that the document.
Example of horizontal ruled lines:
<hr width=50> <hr width=50%>
<hr size=7> <hr noshade>
You may also use several attributes within one tag... <hr width=50% size=10 noshade>
To insert a horizontal line:
1. Type <hr where you want the rule to appear. The text that follows will appear in a new paragraph below the line.
2. Type size=n where n is the line's height in pixels.
3. Type width=n where n is the width of the line in pixels, or as a percentage of the document's width.
4. Type align=direction where direction is the alignment of the line, either left,right or centre. The align attribute is only effective if you have made the rule narrower than the document.
5. Type noshade to create a solid bar with NO shading
6. Type the final > to complete the horizontal line tag.
Exercise (b)
Type this into your Notepad program. First click File from the menu, then click New. Now Save the file, in your Exercise folder, as unit2b.htm and then continue typing the exercise. When you have finished typing the exercise, view it in your Browser
Make any changes that are necessary by clicking back and forward between the Browser and Notepad by using the Taskbar buttons. Remember to Save your changes in Notepad, and then click Refresh in the Browser to update your changes.
You can see what your exercise should look like on the next page.
<html>
<head><title>My Headings</title></head>
<body>
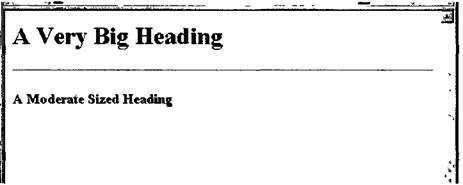
<h1>A Very Big Heading</h1>
<hr>
<h3>A Moderate Sized Heading</h3>
</body> </html>
What your exercise should look like in Internet Explorer
Paragraphs
You will often use paragraphs in HTML, just as you do when you write stories. The opening tag for a paragraph is <p>.The closing tag is </p> although it is not necessary to use it
HTML does NOT recognise the RETURN (on your keyboard) when you enter in your text editor To start a new paragraph in your Web page you must use the <p> tag.
To begin a new paragraph:
1. Type <p
2.
Type
align=direction where direction is left, right or centre. This will align the
text in
the
paragraph
3. Type >
4. Type the contents of the paragraph.
5. You could now type </p> but it is not necessary
NOTE.The header <hn> and horizontal line <hr> tags include paragraph markers, so you don't need to add a <p> to start a new paragraph.
Exercise
Type this in your Notepad program. Name your file unit3.htm Save it into your Exercise folder, (be sure to type .htm at the end.) Then view it in your Browser and close when you have finished. You can see what your exercise should look like on the next page.
<html>
<head><title>My Paragraph Markers</title></head>
<body>
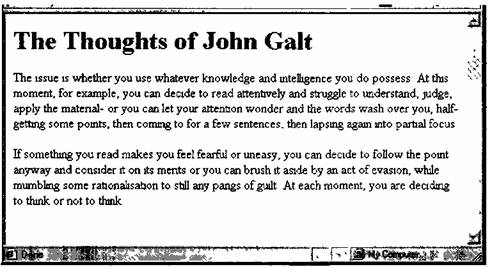
<h1>The Thoughts of John Galt</h1>
The issue is whether you use whatever knowledge and intelligence you do possess. At this moment, for example, you can decide to read attentively and struggle to understand, judge, apply the material- or you can let your attention wonder and the words wash over you, half-getting some points, then coming to for a few sentences, then lapsing again into partial focus <p>lf something you read makes you feel fearful or uneasy, you can decide to follow the point anyway and consider it on its merits or you can brush it aside by an act of evasion, while mumbling some rationalisation to still any pangs of guilt. At each moment, you are deciding to think or not to think.
</body>
</html>
What your exercise should look like in Internet Explorer
Line Breaks
When your HTML document is viewed, normally the text will do a word-wrap at the end of a line. If you want to have the text BREAK (go to another line) you will use the <br> tag. This tag has no closing tag. When you start a new paragraph with the <p> tag, most Browsers insert a large amount of space. To begin a new line WITHOUT so much space, you use a line break.
Example WITHOUT line Break:
Sentence One. Sentence Two. Sentence Three.
Example WITH line Break:
Sentence One.<br>Sentence Two.<br>Sentence Three.
What the browser shows:
Sentence One. Sentence Two. Sentence Three.
To insert a line break:
1. Type <br> where the line break should be. There is NO closing tag.
Exercise
Type this in your Notepad program. Name your file unit4.htm Save it into your Exercise folder. View it in your Browser and close when finished.
<html>
<head><title>My Paragraph Markers</title></head>
<body>
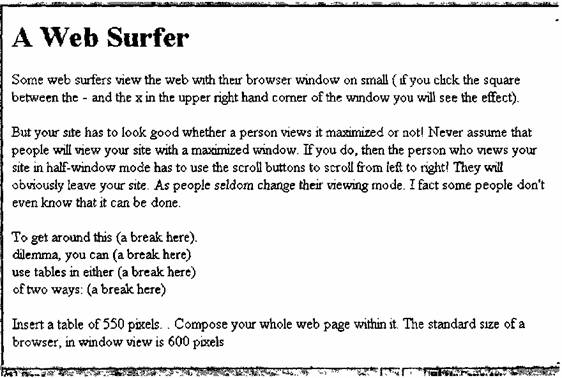
<h1>AWebSurfer</h1>
Some web surfers view the web with their browser window on small (if you click the square between the — and the X in the upper right hand corner of the window you will see the effect).
<p> But your site has to look good whether a person views it maximized or not!
Never assume that people will view your site with a maximized window. If you do, then the person who views your site in half-window mode has to use the scroll buttons to scroll from left to right! They will obviously leave your site. As people seldom change their viewing mode. In fact some people don't even know that it can be done.
<p>
To get around this (a break here): <br> dilemma, you can (a break here) <br> use tables in either (a break here) <br> of two ways: (a break here) <p>
Insert a table of 550 pixels. . Compose your whole web page within it. The standard size of a browser, in window view is 600 pixels.
</body></html>
What your exercise should look like in Internet Explorer
Assignment: A Simple Home Page
Type the HTML tags required to produce the following Web page. Insert your own name where applicable.
1. The heading sizes used are 1,2 and 3.
2. The font size is normal/default.
3. The letter < i > is used for italic.
4. Note the last paragraph of the page ( Last updated on.......... ) contains NO spaces between the lines.
5. Nameyourfileneohealth.htm.
6. Save it in your Exercise folder. Don't forget the .htm
7. View it in your Browser. Making any changes that are necessary.
8. Try also experimenting with different line widths. Points to keep in mind are:
• Use quotes around values in attributes.
For example, if you want a horizontal rule that is half of the screen width:
type <hr width="50%">
rather than <hr width=50%>
if you want ore that is size 5
type <hr size="5">
rather than <hr size=5>.
• Don't overlap tags. Overlapping occurs when Tag A starts, Tag B starts, Tag A closes, then Tag B closes. This will cause errors in sensitive browsers.
Examples:
• Wrong way (overlaps):
<font size=+1><b>This is bold and one font size bigger</font></b>
• Right way (doesn't overlap):
<font size=+1><b>This is bold and one font size bigger</b></font>
• Wrong way (overlaps):
<a href="here.html"><i>This link is italicised</a></i>
• Right way (doesn't overlap):
<a href="here.html"><i>This link is italicised</i></a>
Exercise: Correcting Links
Please download this example, unzip it and correct the links, so that you can see the proper pictures on the page. The pictures are located in the folder called images.
![]()